
A freestanding bath can reshape your bathroom layout while establishing a clear interior style. Its exposed form creates a focal point, improves visual flow, and gives you more flexibility than a built-in model. You’ll need to assess circulation space, plumbing routes, floor strength, and the bath’s proportions before choosing a position. The right combination of placement, shape, and finishes can make even a compact room feel deliberate—provided you solve the practical details first.
Key Takeaways
- Freestanding baths create a striking focal point, giving bathrooms a stronger architectural presence and more distinctive interior style.
- Their flexible positioning supports varied layouts, including central, window-facing, corner, and asymmetric arrangements.
- Sculptural shapes, materials, and finishes allow baths to complement modern, traditional, minimalist, or eclectic schemes.
- Adequate clearances, structural support, plumbing access, and ventilation are essential for practical, safe installation.
- Coordinating taps, lighting, surfaces, storage, and accessories ensures the bath integrates harmoniously with the overall bathroom design.
Why Choose a Freestanding Bath?

A freestanding bath creates a strong visual focal point while giving you greater flexibility in bathroom layout and installation. You can select from acrylic, stone resin, cast iron, or composite models, each offering different weight, heat-retention, and maintenance characteristics.
Before purchasing, check the finished floor’s load capacity, confirm waste compatibility, and allow sufficient access for delivery and servicing.
A freestanding design also removes the need for a surrounding enclosure, so you can display sculptural contours, exposed feet, or a clean contemporary profile. It’s worth remembering designer freestanding baths don’t need to cost a fortune.
Its deeper basin and ergonomic shape can provide luxury comfort, while broad sizing and form options support design flexibility.
You’ll still need properly rated floor protection and accurately positioned plumbing connections, but the result is a durable feature that combines practical performance with a deliberate architectural presence.
Where Should You Position a Freestanding Bath?
Position your freestanding bath where it has adequate clearance, strong floor support, and a practical route for water, waste, and ventilation connections. Check joist direction, structural loading, and finished floor levels before installation.
Keep the bath accessible from at least two sides so you can clean its exterior, inspect fittings, and service the trap without removing surrounding fixtures.
Place it near a window only if glazing, condensation control, and privacy meet your requirements. Privacy considerations should guide views from doors, adjacent rooms, and nearby properties; use frosted glass, blinds, or strategic screening where necessary.
Align the bath with a focal wall, architectural feature, or view to strengthen the room’s composition.
Creative lighting, such as concealed perimeter illumination or adjustable wall fittings, can highlight the bath without creating glare or unsafe shadows.
How Can a Freestanding Bath Fit a Small Bathroom?
You’ll need to measure the available floor space, including clearance around the bath and access routes.
Choose a compact design with a narrow footprint, shorter length, or wall-side installation to preserve circulation.
Maximise surrounding storage with recessed shelves, wall-mounted units, or a slim vanity.
Measure Available Floor Space
Before choosing a freestanding bath, measure the room’s usable floor area, excluding skirting boards, door swings, radiators, and other fixed obstructions. Record the remaining floor space at several points, since walls may not run perfectly parallel.
Note the room dimensions, ceiling height, plumbing positions, window locations, and the direction of every door’s movement. Mark these details on graph paper or create a scaled digital plan.
Allow sufficient clearance around the proposed bath for cleaning, towel access, and safe movement; don’t measure the bath alone. Check the distance between its projected edges and nearby walls, sanitaryware, and heating equipment.
Then confirm that you can carry the bath through hallways, doorways, and stairwells. Measure twice before ordering, because a few centimetres can determine whether installation remains practical.
Keep access routes unobstructed during installation, too.
Choose Compact Bath Designs
Once you know the usable floor area and clearance limits, select a compact freestanding bath that fits the room without restricting movement. Choose a shorter tub, typically 1,400–1,500 mm long, and verify its external width, rim height, and required service access.
A back-to-wall or slipper-style model can reduce the visual footprint while preserving comfortable bathing depth. Position the bath near existing water and waste connections to limit pipe runs and protect circulation space.
Check the door swing, shower screen requirements, and manufacturer’s installation clearances before ordering. Tapered ends can create additional knee room, while a narrow oval profile softens tight geometry.
Match the finish to your scheme: a painted exterior adds Vintage charm, whereas a crisp white, stone, or matte surface introduces Modern elegance without overwhelming the room.
Maximise Surrounding Storage
Maximise the storage around a freestanding bath by using the wall space and narrow gaps it leaves available. Install a recessed cabinet or shallow wall-mounted shelves nearby, keeping their depth below 200 mm so they don’t obstruct circulation.
Use vertical compartments for towels, toiletries, and cleaning supplies, while a slim rolling unit can occupy a gap beside the tub. Choose moisture-resistant plywood, sealed timber, or powder-coated metal, and maintain ventilation to prevent mould.
Keep frequently used items within reach, but store chemicals in closed, child-secure compartments. Open shelving can display decorative accents without crowding the floor; limit objects to maintain visual order.
Add integrated lighting options beneath shelves or inside cabinets, using IP-rated fittings and warm, low-glare LEDs. Guarantee every unit remains accessible without interfering with bath access, plumbing, or cleaning.
What Plumbing and Floor Support Does It Need?
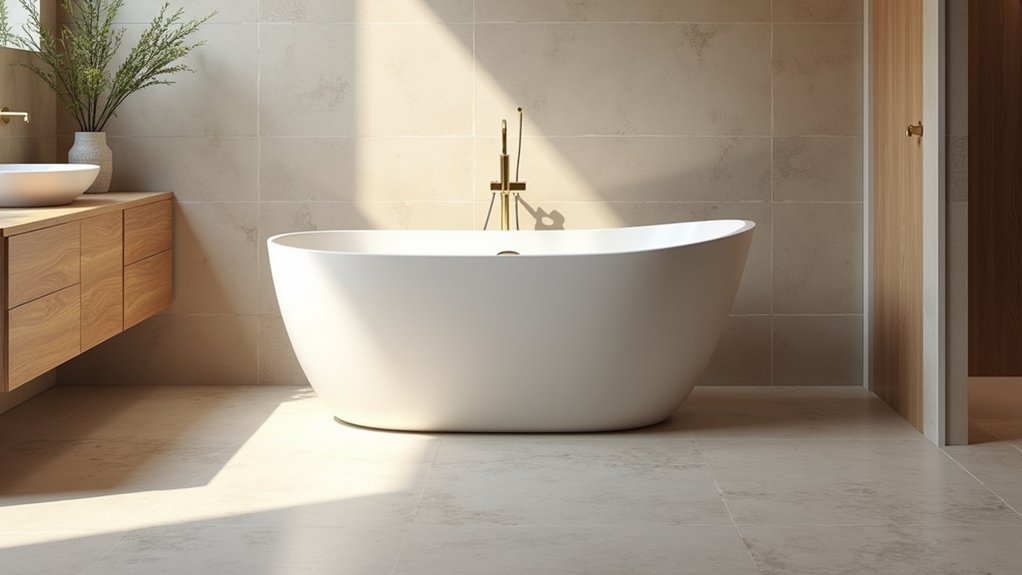
A freestanding bath needs properly positioned hot and cold supplies, a waste connection aligned with its outlet, and sufficient floor support for its filled weight. Before installation, you’ll need to confirm the manufacturer’s service requirements and coordinate pipe routes beneath or beside the tub.
Drain placement matters: position the waste precisely beneath the outlet, allowing enough fall for reliable discharge and access for maintenance. Use suitable traps and water-sealed connections, and test every joint before closing the floor.
Check joist direction, spans, and existing damage with a qualified installer. A full bath can impose a substantial concentrated load, so Floor reinforcement may require additional noggins, doubled joists, or a load-spreading platform.
You’ll also need a level, rigid finished surface; movement can stress waste connections and cause leaks. Follow local plumbing regulations throughout.
Which Freestanding Bath Size and Shape Suit You?
Choosing the right bath size starts with measuring your room, access route, and required clearance around the tub.
You’ll then need to compare freestanding shapes—such as oval, rectangular, slipper, and bateau—to match your space, plumbing position, and bathing posture.
Consider internal dimensions as well as the external footprint, since rim width and angled walls affect usable capacity.
Choosing the Right Bath Size
How much space you have—and how you plan to use the bath—should guide its size and shape. Measure the finished floor area, door swing, access route, and required clearance around the tub before choosing a model.
A compact bath can suit a smaller room, while a longer design gives taller users better support; check the internal length, width, and soaking depth rather than relying on external dimensions.
You’ll also need to confirm floor loading, waste-pipe location, and tap compatibility, particularly with heavier Bath materials such as stone resin or cast iron.
Choose capacity carefully: a deeper, wider tub consumes more water and may increase heating costs, so Water efficiency depends on matching volume to your routine.
Leave enough circulation space to clean safely and access plumbing.
Exploring Freestanding Bath Shapes
Once you’ve established the required dimensions and clearances, match the bath’s shape to your room layout and bathing preferences. A symmetrical oval bath softens hard lines and suits central or wall-adjacent placement, while a rectangular model maximises usable length and aligns neatly with tiled walls.
Choose a slipper shape if you want raised back support for longer soaks; its higher end also creates a strong visual focal point. Double-ended designs let you recline at either end, making them practical for shared bathrooms.
Consider corner and asymmetric forms where circulation space is limited, but check that the rim remains accessible for cleaning. Material options, including acrylic, stone resin, and cast iron, affect weight, heat retention, and installation requirements.
Compare each profile’s footprint, tap position, waste access, and design versatility before you commit.
How Should You Coordinate Fixtures and Finishes?
Coordinate the bath, taps, shower fittings, cabinet hardware, and accessories by aligning their finishes and visual weight rather than matching every item exactly.
Use Color coordination to establish hierarchy: select one dominant metal, such as brushed nickel or aged brass, then limit contrasting finishes to deliberate accents. Repeat that accent at least twice so it looks intentional.
Material matching also matters. Pair smooth ceramic with honed stone, ribbed glass, or timber to introduce controlled texture without creating visual noise.
Check undertones under your bathroom lighting; warm metals suit cream and beige surfaces, while chrome complements cooler whites and greys.
Keep profiles consistent, combining angular fittings with a geometric bath and rounded fittings with softer forms.
Coordinate grout, sealant, and exposed pipework, since these details can interrupt an otherwise cohesive scheme.
How Do You Choose the Right Freestanding Bath?
Choose a freestanding bath by evaluating its dimensions, capacity, installation requirements, and relationship to the room’s layout. Measure doorways, access routes, and clearances around the tub before ordering.
Compare internal length, width, and depth with your preferred bathing position, while checking the filled weight against the floor’s structural capacity.
Confirm whether the model requires floor-mounted or wall-mounted taps, a compatible waste, and accessible plumbing beneath or beside the basin.
Select acrylic, stone resin, or cast iron according to heat retention, weight, durability, and maintenance needs.
Consider how the finish works with your existing fixtures.
Plan bathroom lighting to reduce glare and highlight the bath safely.
Review ventilation options, especially in compact rooms, to control condensation and protect surrounding surfaces.
Finally, verify warranty, delivery constraints, and cleaning requirements.
Frequently Asked Questions
How Often Should You Clean and Maintain a Freestanding Bath?
Clean your freestanding bath weekly; rinse and dry it after each use. Your Cleaning frequency may increase with hard water. Follow Maintenance tips: inspect seals monthly, remove buildup promptly, and check plumbing annually.
Are Freestanding Baths Comfortable for Children and Older Adults?
When safety comes first, freestanding baths can suit children and older adults. Prioritize Child safety with nonslip surfaces, supportive grips, and supervision; improve Elderly accessibility using grab rails, stable seating, and low-threshold entry.
Can You Install a Shower Over a Freestanding Bath?
Yes, you can install a shower over a freestanding bath, but shower compatibility depends on the tub’s shape, stability, and waterproofing. You’ll face installation challenges requiring secure wall framing, suitable screens, and compliant plumbing connections.
How Long Do Freestanding Baths Typically Last?
You’ll typically enjoy 20–30 years from a freestanding bath. Material durability matters: cast iron lasts longest, acrylic less. Proper cleaning, stable supports, and professional installation reduce damage; installation complexity can affect longevity, especially with plumbing movement.
Are Freestanding Baths More Difficult to Keep Warm?
Yes, freestanding baths can cool faster, especially thin-walled models. Improve temperature maintenance with insulation solutions beneath or around the tub, minimize drafts, use hotter fill water, and keep adding warm water during longer soaks.
Conclusion
A freestanding bath can transform your bathroom’s layout, comfort, and visual character. Choose its position, dimensions, and shape according to available clearance, circulation, and bathing needs. Before installation, confirm floor strength, waste routing, and accessible plumbing. Then coordinate taps, sanitaryware, lighting, and finishes to create a cohesive scheme. With careful planning, your bath won’t merely occupy space—it’ll anchor the room, balancing practical performance with sculptural style and turning everyday routines into a refined retreat.